I'm on day 5 of a 10 day juice fast. I'm starving. I'm doing the juice fast for three reasons... Number one, I watched a documentary call "Fat, Sick and Nearly Dead" and my interest was sparked. Number two, I've heard that 10 day juice fasts do wonders for your skin. Number three, it's good to detox your system every now and then. I usually do a three day juice fast, but this time I decided to go with 10 days and see how it goes.
This has been my lunch for the past five days. Spinach, cucumber and lime. I cut the cucumber in half and peel it, then I peel the lime. I put two handfuls of spinach leaves, the peeled cucumber and the whole lime (minus the peel) into my Nutri Bullet (purchased from an info-mercial). Add water, flax oil and blend for thirty seconds. It taste exactly like a lime (kinda sour), but with a little more texture.
For breakfast and dinner I mix in tons more veggies and sweeter fruits (pears and apples) to make a "heartier" juice. I like the Nutri Bullet because it creates more of a juicy texture than a blender but creates less mess than a juicer. Nutri Bullet did not pay me to say that... but they can if they want.
The first day was the worst, I had a headache from no coffee and I was super hungry. The second day was a little better, but I thought about chicken bacon ranch pizza the whole day. The third day was about the same as the second day. The fourth day I got really hungry about 2pm and ate some Wholly Salsa with a spoon. Today is a little better, drinking lots of water. I will keep you updated with the final results.
Showing posts with label food. Show all posts
Wednesday, April 17, 2013
Saturday, March 16, 2013
pizza friday
Every Friday night we eat pizza. Every now and then we go out to a favorite locally owned pizza place, but most of the time we do it this way. We like teaching our kids about "slow food." In a world where everything is fast, it's nice to go to a lot of trouble and take a long time for beautiful, delicious food. They wait and wait and smell and wait and then we eat... and eat. Pizza Friday is a treasure to my heart.
Friday, January 18, 2013
make a face mask in your kitchen
My sisters and I were all together last week. There was a magazine with tons of homemade beauty tips, one thing led to another and BOOM we all ended up with strawberries on our face. The recipe is simple: plain yogurt, raw strawberries, and almonds.
We chopped the almonds in a food processor until they look like a fine powder. We smashed the strawberries in a bowl. We added the yogurt, stirred it up and smeared it all over our faces.
After about 20 minutes, we wiped the mask off with a warm cloth and our faces were SO smooth and clean! You must try this one. One of us may or may not have added a little honey and ate the rest of her mask for breakfast.
Tuesday, December 4, 2012
brownies with ice cream stars
I decided to make brownies. Bob's Red Mill Gluten Free brownie mix is pretty much fool proof and delicious. Since it's Christmas I made little ice cream stars to top the warm brownies. It was like a Christmas miracle in my mouth. Here's what you need...
Make the brownies according to package directions. While they are baking, empty a pint of butter pecan ice cream (or whatever ice cream you like) into a casserole dish. Let it get a little melty, then spread with a spatula to cover the entire casserole dish. I mixed a little milk to make it softer. Put the casserole dish in the freezer for 30 minutes or longer. When brownies are baked and cool enough to eat, cut out ice cream stars using a cookie cutter, place on top of brownie and eat it up!
The stars were a little hard to get out of the dish, so they don't look perfect... which makes them even cuter. What are your favorite holiday treats?
Make the brownies according to package directions. While they are baking, empty a pint of butter pecan ice cream (or whatever ice cream you like) into a casserole dish. Let it get a little melty, then spread with a spatula to cover the entire casserole dish. I mixed a little milk to make it softer. Put the casserole dish in the freezer for 30 minutes or longer. When brownies are baked and cool enough to eat, cut out ice cream stars using a cookie cutter, place on top of brownie and eat it up!
The stars were a little hard to get out of the dish, so they don't look perfect... which makes them even cuter. What are your favorite holiday treats?
Thursday, October 11, 2012
peanut butter cups
Lord knows I love a peanut butter cup. I found this recipe and decided to try it immediately. It did not let me down. These things are good. Dean said they are "off the chain," which I assume is something wonderful and spectacular. AND it only takes 4 ingredients... no baking, no measuring... happy.
You'll need: 1 bag of chocolate chips, 1 cup of peanut butter (about half a jar), 1 Tbsp. Butter (softened), powdered sugar and festive baking cups.
1. Melt half the bag of chocolate chips over medium/low heat and pour into baking cups. Freeze 15 min.
2. While the chocolate is freezing, whisk peanut butter, butter and powdered sugar together with stand (or hand held) mixer. Add powdered sugar a little at a time until it's sweet enough for ya. Then dollop peanut butter mixture onto frozen chocolate in baking cups. Pick the pan up and drop it a few times to get the peanut butter all smooth and even. Freeze 15 min.
3. Melt remaining chocolate and pour over peanut butter. Drop the pan a few times and quickly get them back into the freezer for about 20 minutes.
4. Let them sit in the fridge or at room temperature before serving. Peel off the paper cups and eat it up. So good. You're welcome.
You'll need: 1 bag of chocolate chips, 1 cup of peanut butter (about half a jar), 1 Tbsp. Butter (softened), powdered sugar and festive baking cups.
1. Melt half the bag of chocolate chips over medium/low heat and pour into baking cups. Freeze 15 min.
2. While the chocolate is freezing, whisk peanut butter, butter and powdered sugar together with stand (or hand held) mixer. Add powdered sugar a little at a time until it's sweet enough for ya. Then dollop peanut butter mixture onto frozen chocolate in baking cups. Pick the pan up and drop it a few times to get the peanut butter all smooth and even. Freeze 15 min.
3. Melt remaining chocolate and pour over peanut butter. Drop the pan a few times and quickly get them back into the freezer for about 20 minutes.
4. Let them sit in the fridge or at room temperature before serving. Peel off the paper cups and eat it up. So good. You're welcome.
Saturday, September 15, 2012
pumpkin pie milk shakes
We invited some friends over last Thursday night for desserts and coffee. I wanted to be a cute little hostess and make little pumpkin pies with homemade whipped cream. I have made this dessert many times before. It's pretty much the only thing I make when people come over between the months of September and February. Because it's delicious. After the pies came out of the oven I wanted to sample one... to make sure they weren't bad... it's a price I'm willing to pay. Anyhoo, they tasted horrible... like maybe what a pumpkin would taste like if you ate it straight out of the can. (Pumpkins come out of cans right?) I retraced all my pie-making steps and realized that instead of sweetened condensed milk, I used evaporated milk... BIG DIFFERENCE! Evaporated milk is not sweet... at all. So after a trip to our local bakery to pick up another dessert, I decided that ice cream might make the pies taste sweeter. The kids helped me crumble a few pies (crust included) into the blender, scoop some ice cream, drip a little honey and add about a cup of vanilla almond milk. Blend for thirty seconds and O. MY. GOODNESS. It was delish. The chunks of graham cracker crust made my heart happy.
We will do this again... with sweet pies. September is for things that taste like pumpkins! Enjoy.
*To make mini pumpkin pies:
1 can canned pumpkin
1 5oz can sweetened condensed milk
2 eggs
1Tbsp. cinnamon
1Tbsp. pumpkin pie spice
Stir all ingredients with a spoon until just combined. Pour into mini graham cracker crusts. Bake at 400 for 45min.
We will do this again... with sweet pies. September is for things that taste like pumpkins! Enjoy.
*To make mini pumpkin pies:
1 can canned pumpkin
1 5oz can sweetened condensed milk
2 eggs
1Tbsp. cinnamon
1Tbsp. pumpkin pie spice
Stir all ingredients with a spoon until just combined. Pour into mini graham cracker crusts. Bake at 400 for 45min.
Thursday, August 16, 2012
every single morning
Apple Cider Vinegar:
at night, I add boiling water to 2 Tbs. of Apple cider vinegar and drink it down. It tastes horrible, but it makes my skin look so clear and bright when I wake up. Also, in the mornings, I add a little to my smoothies or juice (also tastes horrible).
Lemon/Cucumber water:
Before bed, I put lemon and cucumber slices in a glass of water and put in the fridge while I sleep. It's the first thing I drink when I wake up. Very delicious and a great way to detox.
I drink a cup of hot tea every morning.
I usually put a scoop of coconut oil in my tea or coffee. I also rub coconut oil on my lips and elbows at night. And sometimes I eat a big spoonful of it... it's disgusting... but REALLY good for you.
Prenatal Whole Food Supplements:
I'll have to continue these for as long as I'm nursing. They give me all the nutrients I need so I don't feel so bad about the days when I don't eat like I should.
Do you have any bizarre health routines? Well, you should.
Saturday, June 30, 2012
grilled almond butter and jelly sandwiches
This is one of our favorite lunches. We eat LOTS of peanut butter and jelly around here. Whenever we have extra time, I like to grill them. Why? Because it turns plain old PB and J into a warm, crispy, sweet, happy experience. You must try it...
You need:
Bread (we use Udi's Gluten Free Sandwich Bread)
Olive oil
Almond Butter (we like it better than Peanut Butter, but either is fine)
Jelly
Heat the olive oil in a pan and grill BOTH SIDES of the bread. Place your warm, grilled bread on a plate and spread your almond butter and jelly. Enjoy with a side of fruit or chips. O my goodness.Thursday, April 26, 2012
peanut butter chocolate chip cookies
These are the easiest, cutest, fastest, yummiest little cookies you've ever seen! O my! Did I say easy? So easy. Here's what you need:
1 cup peanut butter (or almond butter if you have peanut allergies)
1/2 cup sugar
3/4 cup chocolate chips
2 tsp. vanilla extract
1 egg
Put all ingredients into a bowl and stir together with a rubber spatula until mixed well. Plop spoonfuls of dough onto a cookie sheet and flatten cookies a little with the back of the spoon. Sprinkle tops of cookies with sugar. Bake for 10 minutes at 350 degrees.
See, I told you... EASY. And very delicious! I should also mention that there is no flour involved so these are perfect for all the gluten-sensitive bodies in our house. Happy baking! Enjoy.
1 cup peanut butter (or almond butter if you have peanut allergies)
1/2 cup sugar
3/4 cup chocolate chips
2 tsp. vanilla extract
1 egg
Put all ingredients into a bowl and stir together with a rubber spatula until mixed well. Plop spoonfuls of dough onto a cookie sheet and flatten cookies a little with the back of the spoon. Sprinkle tops of cookies with sugar. Bake for 10 minutes at 350 degrees.
See, I told you... EASY. And very delicious! I should also mention that there is no flour involved so these are perfect for all the gluten-sensitive bodies in our house. Happy baking! Enjoy.
Friday, April 13, 2012
chocolate meringue cookies
When you want something sweet and you don't want to use a lot of ingredients, these little babies are the perfect solution! I had everything already in my kitchen and it only took minutes to mix it all together. After baking, they do need to cool in the oven for about two hours, so you'll need to remind your children (and possibly yourself) to be patient. It will be worth the wait.
You need:
4 large egg whites
1/4 tsp. cream of tartar
1/2 tsp. vanilla extract
1 cup granulated sugar
1/4 cup cocoa powder
Preheat oven to 300 degrees. Line two baking sheets with parchment paper.
Mix egg whites, cream of tartar and vanilla in a stand mixer (with the whisk attachment) until soft peaks are formed. Slowly add sugar and continue mixing until a glossy meringue forms (about 4 minutes of mixing). Fold in cocoa powder with rubber spatula. Drop spoonfuls of sticky meringue mixture onto lined baking sheets and bake for 30 minutes. Turn oven off after 30 minutes and let cookies cool in the oven for two hours. Eat.
Store in an airtight container at room temperature. Gluten free and delish!!! *side note: If you like things to look pretty and perfect, you can place the uncooked meringue mixture into a pastry bag and pipe perfect little shapes onto your baking pans before baking. I don't really care about perfect things.
You need:
4 large egg whites
1/4 tsp. cream of tartar
1/2 tsp. vanilla extract
1 cup granulated sugar
1/4 cup cocoa powder
Preheat oven to 300 degrees. Line two baking sheets with parchment paper.
Mix egg whites, cream of tartar and vanilla in a stand mixer (with the whisk attachment) until soft peaks are formed. Slowly add sugar and continue mixing until a glossy meringue forms (about 4 minutes of mixing). Fold in cocoa powder with rubber spatula. Drop spoonfuls of sticky meringue mixture onto lined baking sheets and bake for 30 minutes. Turn oven off after 30 minutes and let cookies cool in the oven for two hours. Eat.
Store in an airtight container at room temperature. Gluten free and delish!!! *side note: If you like things to look pretty and perfect, you can place the uncooked meringue mixture into a pastry bag and pipe perfect little shapes onto your baking pans before baking. I don't really care about perfect things.
Tuesday, April 10, 2012
colorful cakes
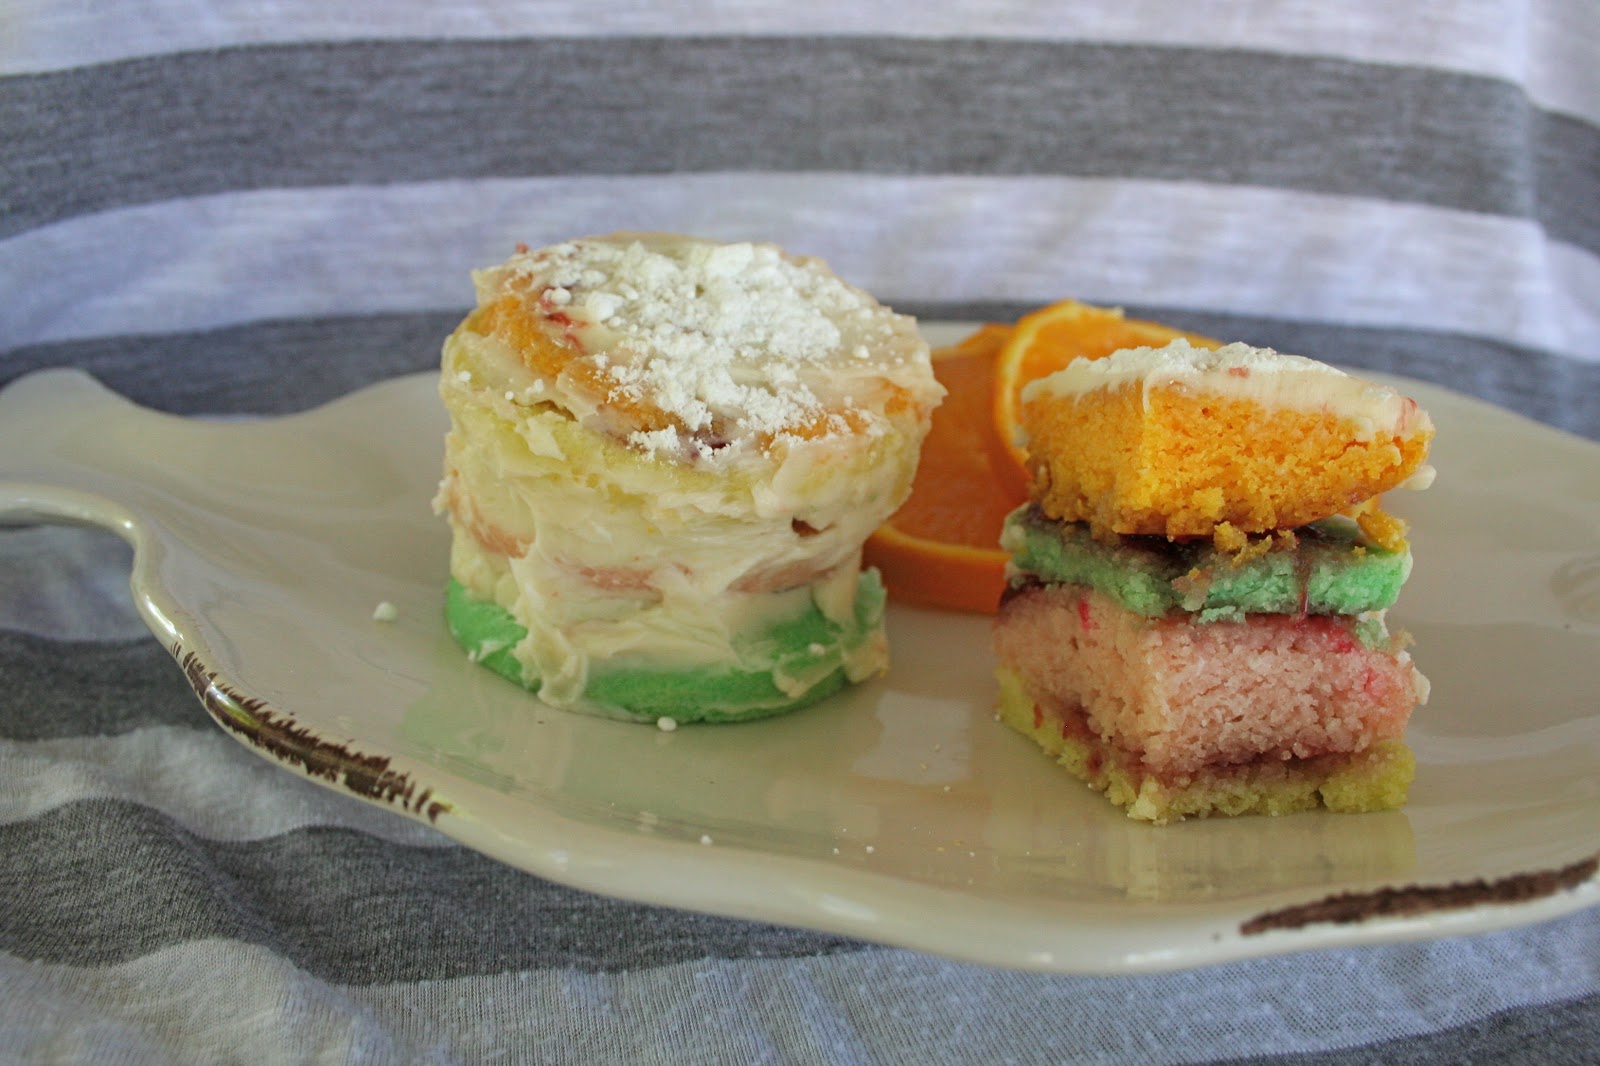
We made these little cakes over Easter weekend. Super fun project to do with the kids. Here's how you make colorful little cakes...
I used a simple cupcake recipe. I've used this one for years (replacing all purpose flour with rice flour). Then add one drop of natural food coloring to the prepared batter. I started with pink (stir into batter and fill 6 cupcake tins) then mixed one drop of yellow into the pink batter (creating orange... fill 6 more cupcake tins with orange batter). It might be a good idea to divide the batter into 4 individual bowls, depending how you want the colors to look.
The cupcake tins are only filled about one third of the way with batter. Also, the batter goes directly into a greased cupcake pan... no paper cups. After baking, I cut each tiny cupcake in half and let the kids stack them with all the different bright colors. We put strawberry jelly between each layer then covered the finished cake with homemade butter cream icing and powdered sugar. SO, SO GOOD, people. So good.
I used a simple cupcake recipe. I've used this one for years (replacing all purpose flour with rice flour). Then add one drop of natural food coloring to the prepared batter. I started with pink (stir into batter and fill 6 cupcake tins) then mixed one drop of yellow into the pink batter (creating orange... fill 6 more cupcake tins with orange batter). It might be a good idea to divide the batter into 4 individual bowls, depending how you want the colors to look.
The cupcake tins are only filled about one third of the way with batter. Also, the batter goes directly into a greased cupcake pan... no paper cups. After baking, I cut each tiny cupcake in half and let the kids stack them with all the different bright colors. We put strawberry jelly between each layer then covered the finished cake with homemade butter cream icing and powdered sugar. SO, SO GOOD, people. So good.
Subscribe to:
Posts (Atom)